5. Connect an Edge appliance #
Your Nimbra Edge installation now has a video region. Next, let’s connect a video appliance at your site to the video region. For this tutorial we will configure the appliance to generate a test stream, so you do not need a camera or other video source.
We are gonna use a Nimbra appliance, for example a Nimbra 520, configured as the Edge role. If you do not have an appliance, you can run Edge Connect on a Linux host instead.
Before you start #
Connect the appliance to your network and make sure you can open its setup interface in a browser. It needs outbound HTTPS access to your Nimbra Edge installation and outbound UDP ports 20000–21000 to your video region. Allow return traffic through the firewall.
Get an appliance secret #
- In Network Manager, open Create New… → Edge Appliance.
- Copy the Appliance secret using the copy button beside it.
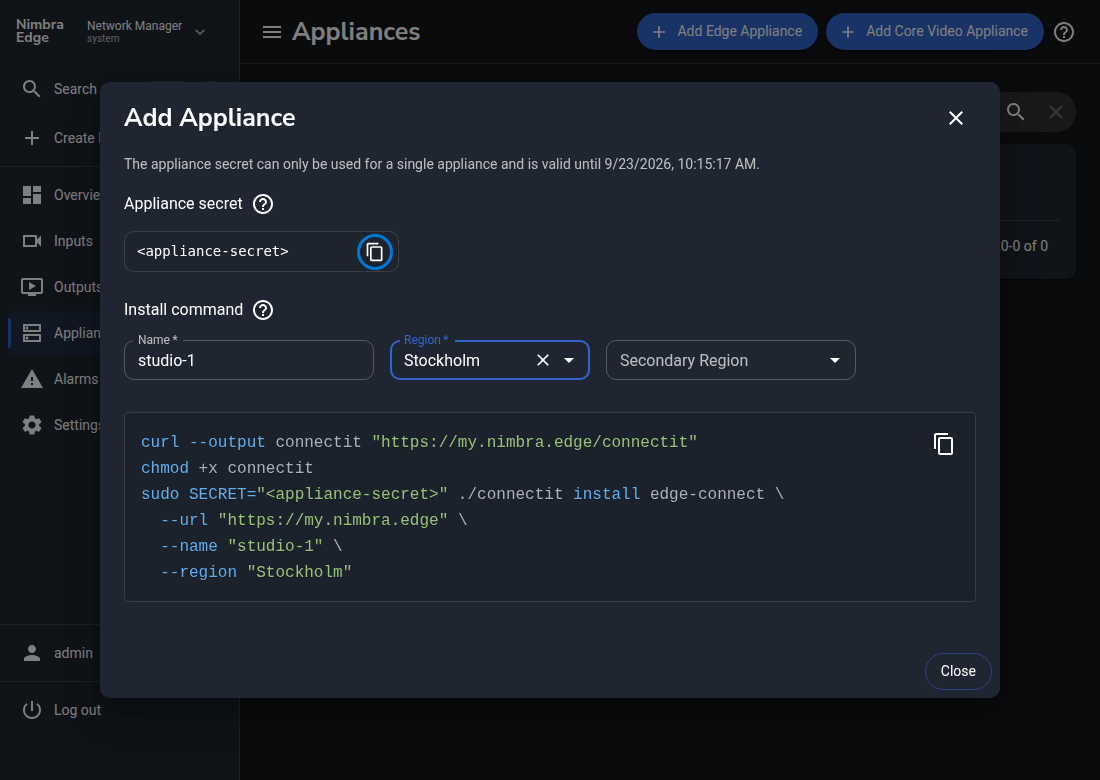
This temporary, single-use secret authorizes the appliance to join your installation. Keep it private; reopen the dialog for a new secret if it expires.
Connect your Nimbra appliance #
-
Open the appliance’s IP address in a browser and sign in with its administrator credentials. Complete any initial password change if prompted.
-
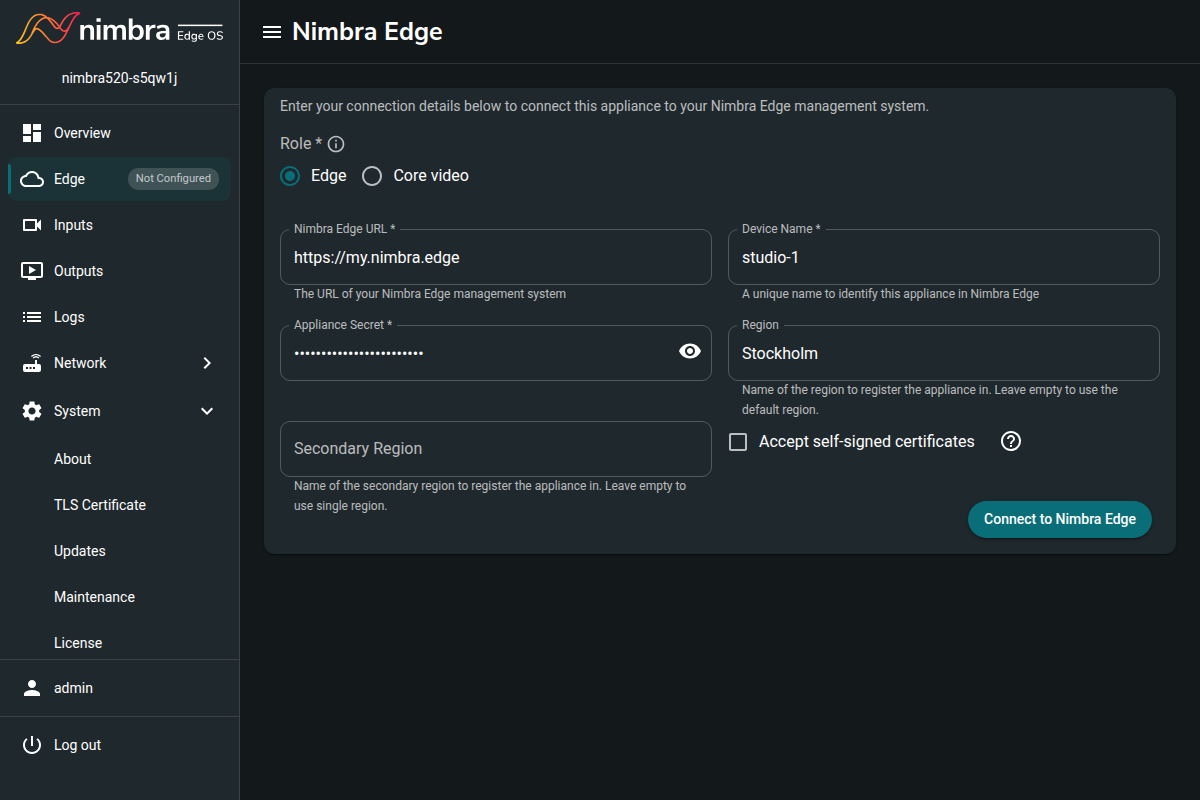
Open Nimbra Edge (called Edge in some versions).
-
Set Role to Edge, then enter:
Field Value Nimbra Edge URL Your Nimbra Edge address, for example https://my.nimbra.edgeDevice Name A unique appliance name, for example studio-1Appliance Secret The secret you just copied Region The video region you created, for example StockholmLeave Secondary Region empty for this tutorial.
-
Click Connect to Nimbra Edge and wait for the connection to complete.
Check the connection #
In Network Manager, open Settings → Appliances. Find your appliance, check that its status is green, and confirm that its role is Edge and its region is the one you selected.
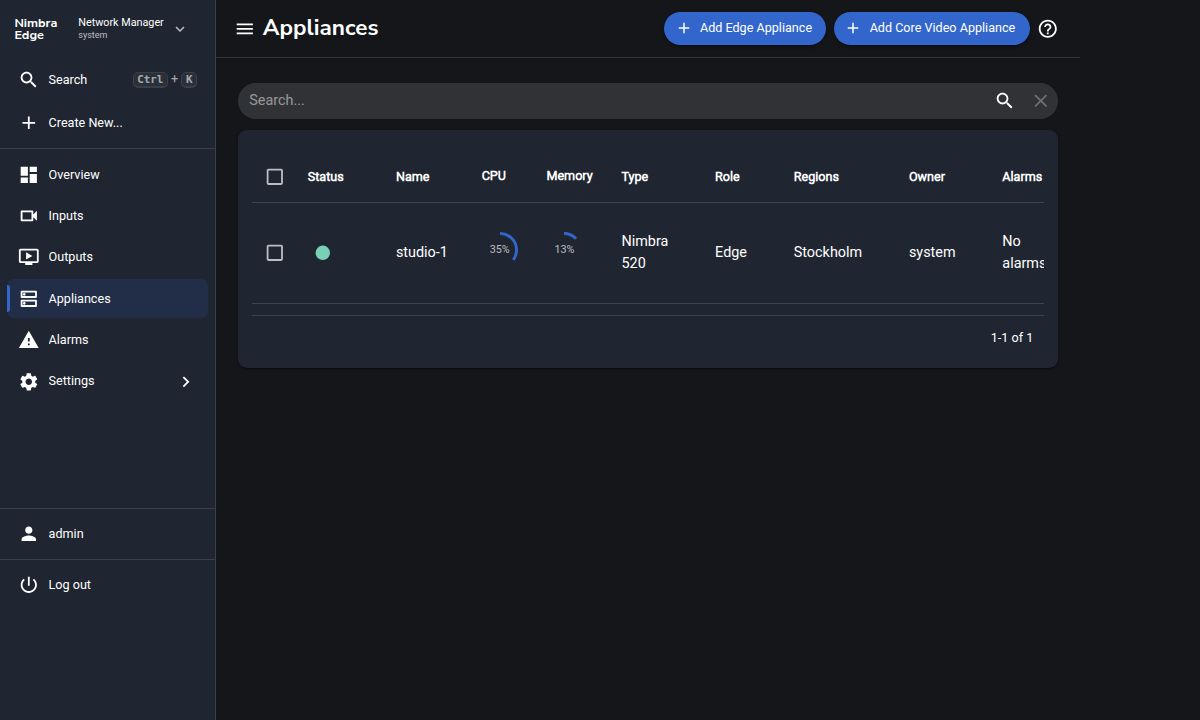
The appliance is ready for the next step, Send your first stream.
Alternative: use a Linux host #
If you do not have a Nimbra appliance, install Edge Connect on a Linux host that meets the video appliance requirements, with Docker Engine installed and permission to run commands with sudo. The same firewall requirements apply, and the host also needs HTTPS access to the image registry.
The CLI tool can adjust host settings and offer to configure Docker logging. Read its prompts before continuing; applying the logging configuration can restart Docker and other containers on the host.
Get the installation command #
- In Network Manager, open Create New… → Edge Appliance.
- Enter a name, for example studio-1.
- Select the video region you created, for example Stockholm. Leave Secondary Region empty for this tutorial.
- Click the Copy to Clipboard icon beside the installation command.
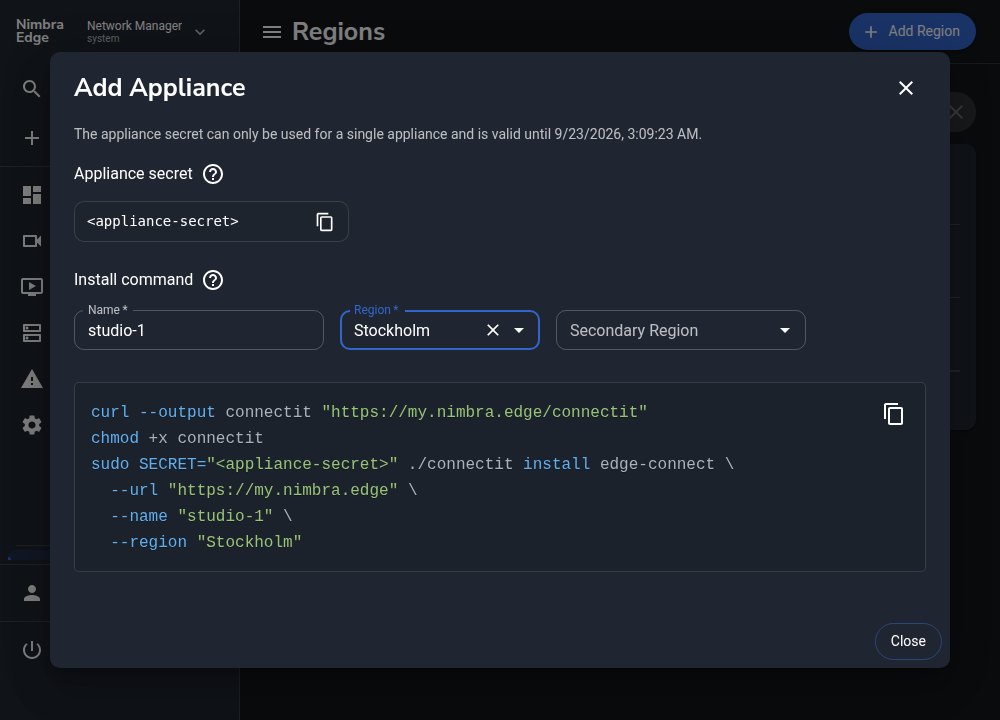
The command includes a temporary, single-use appliance secret. Keep it private. If it expires before you use it, reopen the dialog to get a new command.
Install on the Linux host #
Connect to the host, for example over SSH, and paste and run the copied command. It downloads the CLI tool from your Nimbra Edge installation and starts Edge Connect with the name and region you selected.
$ sudo SECRET="<appliance-secret>" ./connectit install edge-connect \
  --url "https://my.nimbra.edge" \
  --name "studio-1" \
  --region "Stockholm"
Using predefined group secret
Pulling Edge Control image (docker.io/netiedge/edge-control:R4.1.6)
Pulling Edge Data image (docker.io/netiedge/edge-data:R4.1.6)
Starting Edge Connect
Successfully started Edge Connect studio-1 connected to https://my.nimbra.edge!
Follow the prompts. If the image download requires Docker Hub credentials, run sudo docker login with the credentials supplied for your installation and try again.
After installation, check the connection in Network Manager.